My wife is a long-time fan of Ender’s Game, so when the movie came out she decided to make a Dragon Army Flash Suit. Naturally, this meant she needed a gun to go with it, which is where I came in.
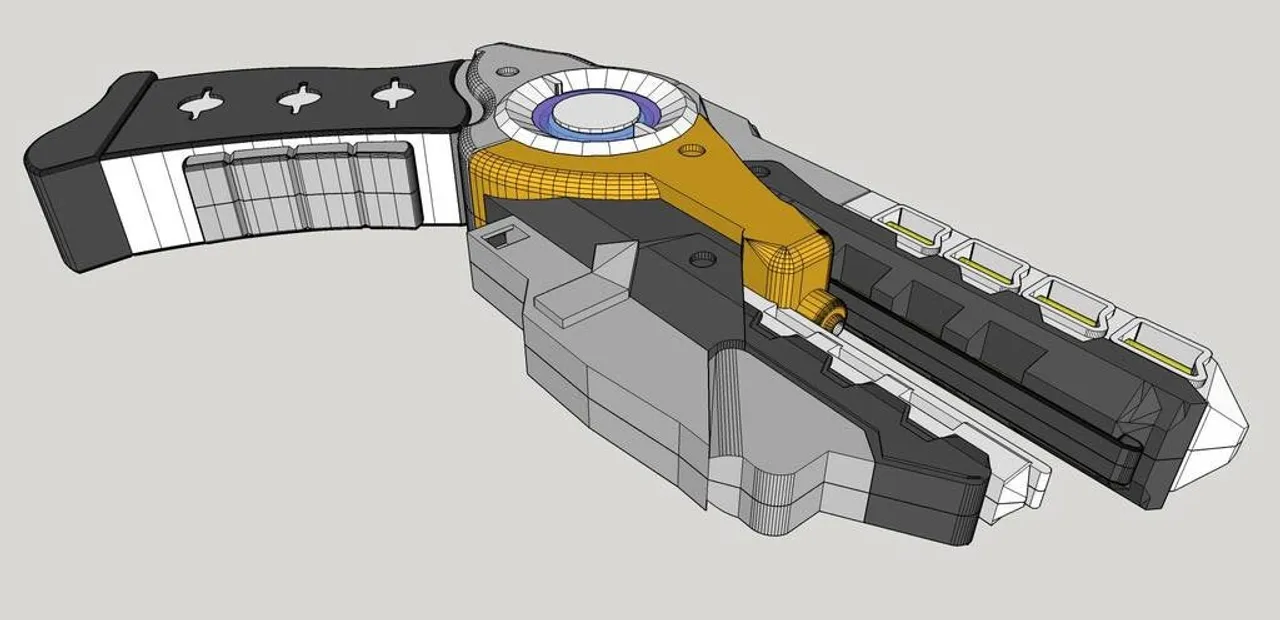
I designed the gun in SketchUp and printed the original on a MakerBot Replicator Dualstrusion. I started out by tracing a side view picture from the movie of the gun. I took this 2D image and started adding depth and layering pieces until I had a solid block model. I took dimensions from the block model and visited SparkFun and adafruit to determine what electronics to use with the final piece.
Researching parts helped me to determine that conventional batteries would not provide the power I needed in the space I had for any reasonable time period. It was time to build my first piece with a rechargeable LiPo battery. With this knowledge, I selected the remainder of the electronics I would need: two small LED rings, a single LED, several resistors and switches, a tiny arduino, and the power board.
I went back to the 3D model to design in hollow spaces and access points for the electronics. With the lessons I learned from my Chitauri Scepter build, I quickly designed in spaces for all the components. I designed in a removable butt on the handle to allow quick and easy access to the piece’s main power switch and recharging port. It took many iterations in SketchUp to get all the parts fitting in such a small space with room for wires to run and bend. The hardest part was ensuring the arduino had enough room for the connections.
With the initial design completed, it was time to print the piece. The majority of the gun was printed from ABS, with the light-up spinner rings in translucent blue PLA, and the grip in Ninjaflex. I had printed with ABS and PLA before so I knew what to expect there. The Ninaflex was new but printed very easily.
Thanks to careful designs (and redesigns), precise measurements, and generous spacing on the electronics, the first test print fit well and there were few issues. Despite my careful work, the internal space for the arduino and wires was still too small. I had to increase the depth of the chamber. This were easily solved in the first piece with careful application of a dremel. The changes were saved in the 3D model.
I designed the circuitry for the piece in EagleCAD so I had a good idea of the circuit design. I used some simple test code on the arduino and built the circuit on a breadboard. With a few iterations, I had what I considered the best layout for the wires and connection points. I mimicked a bit of adafruit’s NeoPixel code to give the side spinners their trailing glow effect. I made sure to leave the intensity and speed settings as variables so I could quickly adjust them and get the effect just right. Several hours later, I had the LED patterns working perfectly as well.
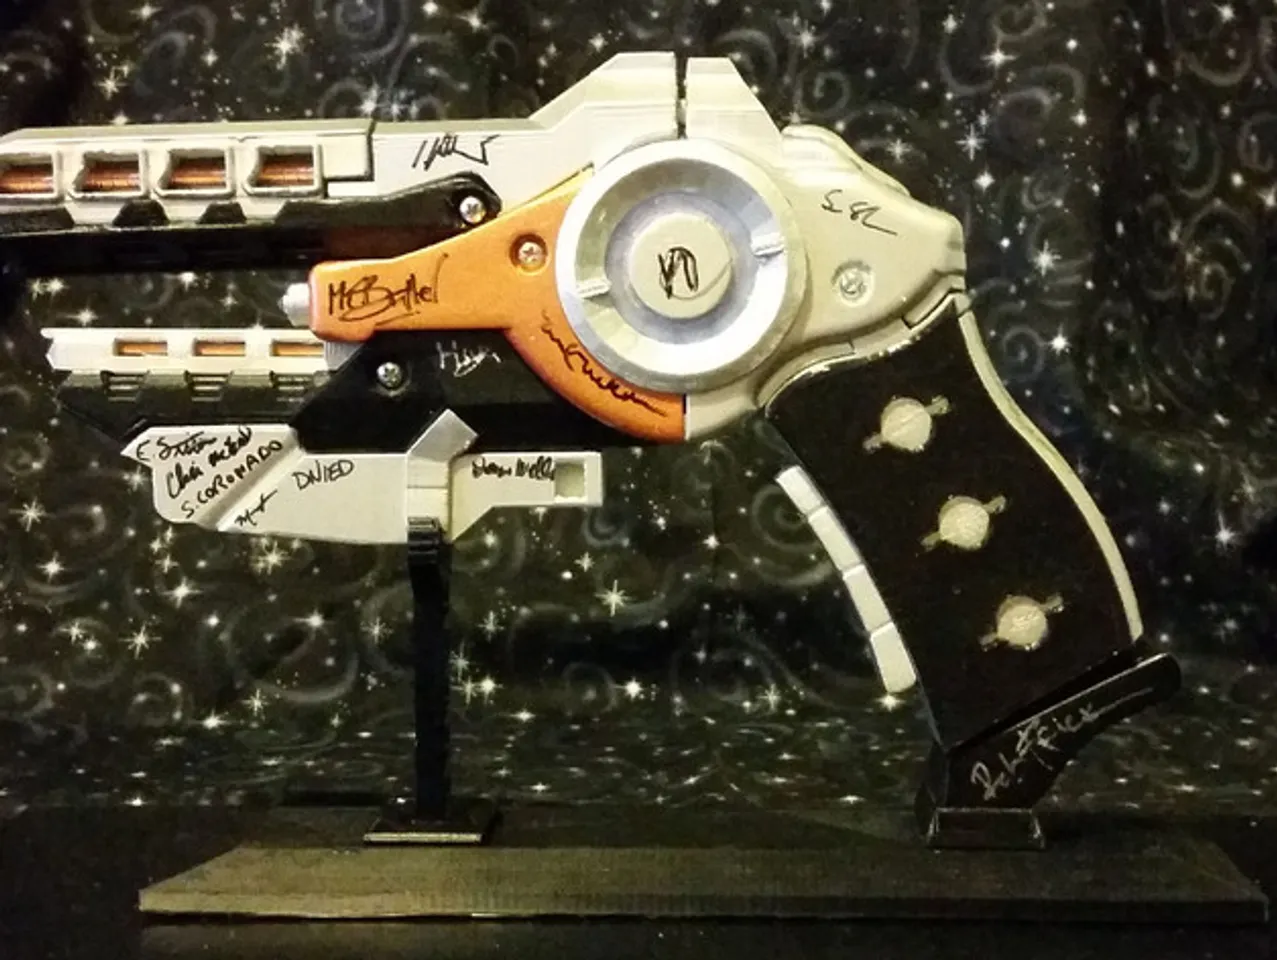
The final product measures approximately 9.5” long, 6” tall, and 1.5” thick. It includes space for LEDs for the “spinner” rings on either side and the “emitter” at the end of the barrel.
I must have gotten something right, because one of the VFX artists who worked on the movie saw this Thingiverse posting and commissioned me to make one. Once he received it, he sent me the following message: “Having held the real thing, I can say that these feel and look extremely close to the original prop. The coating and weight is obviously a little different, but you really nailed the size and proportions of all of the parts, along with the spin up feeling of the LEDs. I can’t believe this came out of a 3D printer.”
Bonus: He was able to get it signed by about 40 of the VFX crew, in addition to Gavin Hood, the film’s director. Pretty sure my wife’s heart stopped for a few moments when she found out!